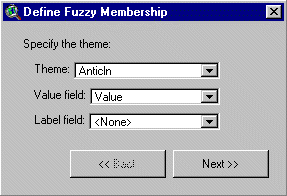
Define Fuzzy Membership
Membership of data in a fuzzy set
is defined using values in the range [0,1]. A value of 1
indicates full membership in the set. In Arc-SDM, fuzzy
membership values are written to the attribute table of the data
set they are defining.
If you want to explicitly define the fuzzy membership value for areas of missing data yourself, you can edit the calculated value in the theme attribute table once the fuzzy memberships have been applied. An alternate technique is to specify a dummy value for the missing data class, that is some value that does not occur in the evidential theme. In this case, the missing data value will be available for the assignment of a fuzzy membership value.
![]()
Define values by table
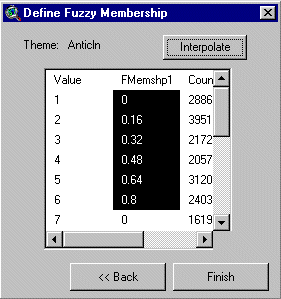
What's in the table:
| Column | Heading | Description |
|---|---|---|
| 1 | Value | The values for which you want to define a fuzzy membership. |
| 2 | FMemshp<#> | The column where fuzzy membership values are entered. |
| 3 - n | Remaining columns are user specified, to guide the selection of fuzzy memberships. |
To... |
|
| ...edit a single membership value: |
|
| ...make a linear interpolation between two fuzzy membership values: |
|
When definition of fuzzy membership values is complete, click 'Finish'.
The values will be written to the grid theme attribute table.
| Next | Section Contents | Home |
![]()
Define values by graph and table
This option allows all of the same functionality as the "table only" option, but also allows users to graphically define a relationship between the values and their fuzzy memberships.
To... |
|
| ...edit a single fuzzy membership value in the table: |
|
| ...edit a single fuzzy membership value in the chart: |
NOTE: The points
can only vary along the y-axis so even if you select a
position to the right or left of the point it will
maintain its position along the x-axis.
|
| ...unselect one selected point: | If there
is only one point selected: Right-click and select 'Unselect point' from
the pop-up menu. If there are two points selected: Selecting 'Unselect point' from the pop-up menu will unselect the first of the two points that was selected. |
| ...unselect two selected points: | Right-click
and select 'Unselect all' from the pop-up menu. OR Click on a third point. This will select that points and unselect the two previously selected points. |
| ...select a second point: | Right-click
near the second point and select 'Select second point'
from the pop-up menu. OR Hold down the shift-key and click the second point. |
| ...apply a linear interpolation of values between two selected values: | Select the
points defining the minimum and maximum values of the
interpolation function. Right-click and select 'Align points between selected' from the pop-up menu. This will adjust the graph and update the values in the table. |
When the definition of fuzzy memberships is complete, click 'Finish'. The values will be written to the theme's attribute table.
| Next | Section Contents | Home |
![]()